youtube facebook twitter instagram
Drevet av Blogger.
  • Hjem
  • Nettbutikk
  • Designteam
    • DT Sissel
    • DT Kirsten
    • DT Anita
    • DT Linda
    • DT Annika
    • DT Helle
    • DT Cathrine
    • DT Elin
  • Om oss
  • Kontakt
  • Maler & tutorials

HOBBYKUNST

 This coloring is sooo easy, anyone can do it. This Christmas card design is sooo simple, anyone can do it. This is a very good card to duplicate easily and quickly many, many times.


This stamp is an old Tim Holtz stamp from my stash. While not available at the moment, there are a number of Tim Holtz stamps that would be equally perfect for this style card. This one would be perfect!

I stamped the image and the sentiment from Mathia's typograf stampset in black ink on a card panel. I took my Copics and chose a light and a dark for each color family - R27, R20, G09. G02, C4 and C2. I used the lighter color along the edges of the coloring area and the darker in the center.

I then ran the card panel through my Big Shot with the MFT Wonky Stitched rectangular die. I attached my card panel to my card base and it was all done. So simple, so easy but still so nice!

Until next time...
Dawn

09:00 No kommentarer

 Today I bring you a card with very light coloring, patterned paper and a little bit of fussy cutting for a cute, any-occasion card.

I stamped the flower from Mathia's hvitveis stampset with black ink. I colored the flower in with Copic colors RV10, RV19, RV69, YG03 and YG17. I fussy cut the flower and took a piece of scrap colored paper closest to the darkest pink Copic color, RV69. I taped the flower to the paper and fussy cut that out so there was a bit of a border around it.

I then stamped the sentiment from the same Mathia stampset with Candied Apple Distress Ink. I found another scrap piece of colored paper that matched the middle Copic pink color, staggered them and taped them all together.

I cut a piece of patterned paper the exact size of my card and attached it to my card base. The final step was to add some foam tape to both the flower and sentiment section and attach them to the card.

Until next time...
Dawn


09:00 No kommentarer

 It's rare when a patterned paper catches my eye but it occasionally happens. My normal modus operandus is to buy it, put it on a shelf, and admire it every couple of months. Am I the only one that does this?!


This time, I was only allowed to buy it if I promised to use it because Connie knows me all too well! And here we have the result of that promise. (I think I should get credit for using it twice because I did use it on the card in my last blog post too!)

I matched up a mother and daughter stamp from Stamping Bella and a sentiment that fit it perfectly from Mathia. I stamped both images, the sentiment on a piece of scrap card stock and the image on Neenah card stock. I colored up the image using my Copics - E00, E41, E50, E01, E11, E33, E93, E37, E49, BG11, BG15, BG57, BG78, YR01, Y11, R27.

I fussy cut out the image and made the sentiment into a banner type shape. I then die cut a pretty oval from Pretty Pink Posh and colored in just the inside piece with Copic color E50. I attached the patterned paper piece from Maggie Holmes to my card base and attached the die cut piece over that. I then used some foam tape on the sentiment and image to add a bit of dimension and attached them to the card.

Until next time...
DT Dawn

09:00 No kommentarer

 I really just wanted to start adding this Shiny Mix washi tape to everything, just splashes of iridescent color everywhere! This is the same washi tape I talked about it my last blog post. I'm still a little obsessed with it. I'm also very glad I took pictures of it after just 2 cards because the rolls are quite a bit smaller now.


So I thought, why can't I add it everywhere? I had planned to use patterned paper with this card as a half and half card but I couldn't resist and added some shiny and iridescent washi tape here too.

First up, I stamped the mother and her newborn image from Stamping Bella (currently out of stock but linked to other SB options), on to a piece of Neenah card stock. I colored her up with my Copics - E01, E21, E50, E51, E53, E93, E95, Y00, Y02, R05, R37, YG06, G09, B32, B34, B41. I trimmed the panel so it left a nice big section for the patterned paper.


I attached the patterned paper to my card base first. Then I attached my colored image to the top of that. I added the washi tape as a pretty transition between the 2 sections. I took the thin sparkly piece and cut it in half using a ruler and a hobby knife (it's pink!) and added those pieces on.

Another quick and simple card, perfect for summer time creativity!

Until next time...
DT Dawn

09:00 No kommentarer

 I got some new washi tape in my hot little hands! I'm not a big washi tape user but I loved the iridescent qualities of some of the rolls and the sparkly qualities of others. As I'm always up for a challenge that pushes me to use things I don't normally use, I took this home and started playing.


I started by stamping one of my favorite mother and daughter stamps from Stamping Bella and my Mathia sentiment (currently out of stock but linked to other options) on a trimmed Neenah panel. I colored it in with my copics - E00, E01, E02, Y00, YR21, YR23, C6, C8, C10, G40, G43, G46, YG06, R81, R83 & R85.


I took another Neenah panel cut to A2 size and lined up the washi tape along each edge. I attached that panel to my card base and then attached the colored image so it was centered and had that lovely iridescent border.


It's summer time and the child is home so I'm going for quick and easy cards this month! 


Until next time...
DT Dawn


09:00 No kommentarer

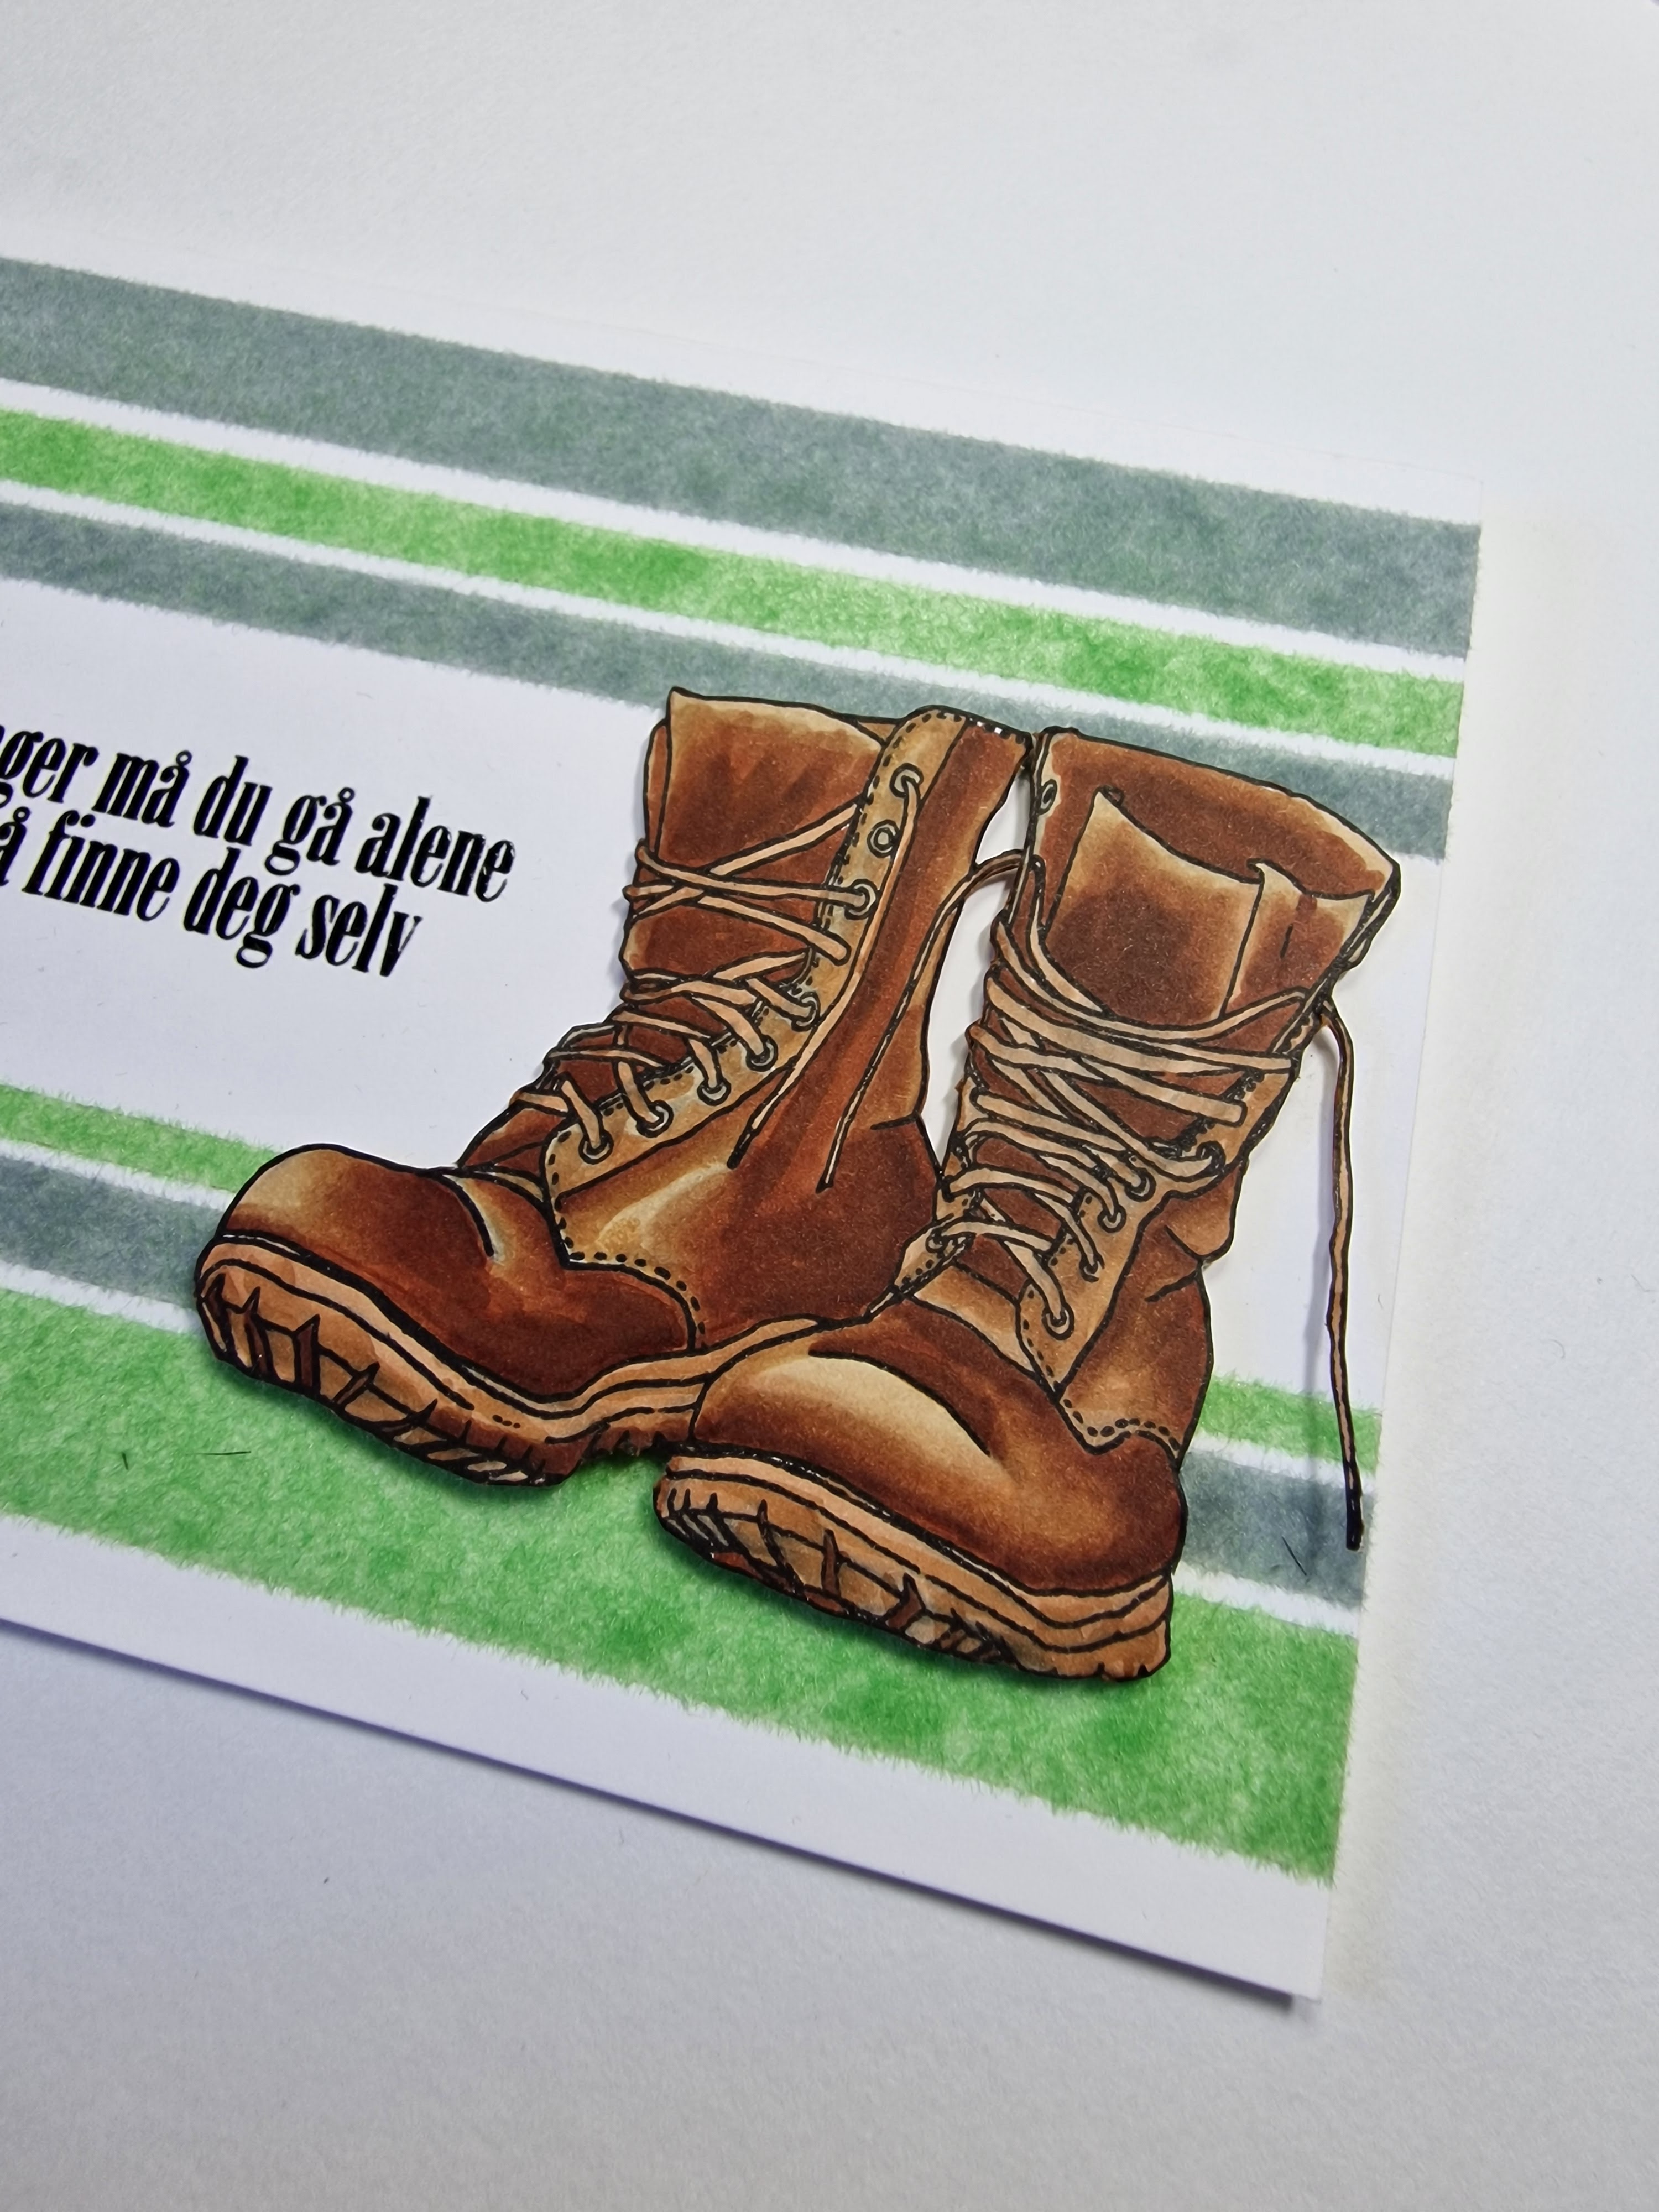
 A little while ago I received a challenge to use a product I had never used before - flock. It's the stuff that is typically seen on commercially available greeting cards that make animals fuzzy to the touch .

I mostly color and paint so this was far from my expertise but I like a good challenge every once in a while so I was in! And here's one of the cards I came up with.


 I admit, the coloring of the boots may have been a little cheaty but I needed something else on the card so.... that's ok, right? First I stamped and colored up the Mathia boots with my Copics and fussy cut that out. Then it was on to the flock.


After watching numerous videos and reading an equal number of blog posts, I felt confident enough to start playing with it. It seemed the easiest method was to use double sided tape. So I grabbed a piece of Neenah and Scor tape in different sizes and started playing. It turned out to be incredibly easy and not at all different than using embossing powder. Really the 2 differences between flock and embossing powder are that 1) you burnish, or press in with a bone folder, the flock to make sure all of the tape is completely covered, and 2) you don't heat emboss it to set it.


Alternating between gray and lime green flock, I did each piece separately so I wouldn't mix colors and just kept at it until I had 6 completely fuzzy stripes. It was fun to feel the card after and it gave me a few ideas for Christmas time!

Once that was done, I stamped the Mathia sentiment in Versafine ink and very carefully heat embossed it with clear embossing powder. I attached the finished panel to my card base and then attached the boots with foam tape to pop them up. 

I hope I've inspired you to try flock! It definitely adds something special to cards. 

Until next time...
DT Dawn

09:00 No kommentarer

 Mathia Design has come out with new stampsets and I have been playing with all of them. Today I'm sharing a simple flower card from one of the new sets. You don't always need lots of bling and glamour on every card, sometimes simple is best. And this card fits that bill!


I started by stamping the image in black ink on to some Neenah card stock. I then stamped my sentiment from the same stampset with Kitsch Flamingo Distress Ink. I took another panel and using the stamp pad itself, rubbed it all along the edges so it would make a nice, matching border.


I colored in the flower with my Copic markers and then trimmed that panel so it would look like the panel underneath was a pink border. I attached the panels together and then attached them to my heavy duty card base. I glued on some bling and the card was done! Clean, simple, and fast!

Until next time....
DT Dawn

09:00 No kommentarer

 I guess technically this card could be considered Clean & Simple but I thought modern grunge'ish felt more appropriate. Generation A is having their confirmations now so I tried to design a card that they might like to get. 

I colored up Martine from Mathia Design in a rainbow sweater (because equality) and gave a little extra color in her hair (individual expressionism) but made the rest casual (comfort).


I started off with stamping Martine and the 2 sentiments, one from the Martine stampset (in Villainous potion) and the other from the Nedover tekst stampset (in black). I stamped all of those images on mask paper, fussy cut them out and covered them on the panel. I then stamped the sirklebakgrunn stamp with embossing ink and heat embossed it with silver embossing powder. I didn't want any of the previous stamps to be affected which is why I used the masks. I also brushed off some of the embossing powder before heating to give it an incomplete, grunge type feeling.


I removed the masks from the panel and colored Martine in with my Copic markers. I really liked how the rainbow sweater came out and it wasn't that difficult to do. (Instead of coloring a solid line, tap the marker to make an irregular line and blend it with the colors on either side of it.)

Once she was colored, I added Salvaged Patina Distress Ink to the background, lightly, with my blending brush. I trimmed the panel so it was slightly smaller than the card. I took another panel (cardstock cut to the size of the card), and rubbed the Salvaged Patina ink pad along the edges so it would match the colors used in the card. I then attached both panels to my card base. I hope you like it!

Until next time...
DT Dawn

09:00 No kommentarer

Happy Easter!

Today's card is a Copic colored Easter card using some stamps I have in my collection with sentiments by Mathia.


First I stamped the bunny and girl with black ink on to a A2 sized piece of Neenah cardstock. I colored them in with Copics and then very carefully created the background behind them. You can also stamp the images on masking paper, cut them out, cover the original images, and color right over them if you want. I didn't feel the need to since the background is fairly simplistic.


Once it was all colored, I stamped the first Mathia sentiment with Versafine and embossed it with clear embossing powder. Then I stamped the 2nd Mathia sentiment (from the same stampset), with clear embossing ink and embossed it with gold embossing powder. I liked the contrast of the black sentiment on the light background but wanted the Easter sentiment to be a little more special.

I die cut the background with MFT's wonky stitches die (one of my favorites!) and attached that panel to my heavy duty card base. 

Until next time...
DT Dawn

09:00 No kommentarer

 I'm a big fan of Clean & Simple cards. I like how much white space surrounds the image to make it really pop out. And I like coloring so C&S works for me.

I started this card like all others, stamping the cheery, Christmas image from Stamping Bella on to my coloring panel. I use the word panel a lot and realized I haven't defined what that is. It's a layer of paper, in this case, of the cardstock I want to color on. The other panel on this card is the Green glitter cardstock I used to frame the image. 


Then I brought out my festive green Copic color combination to use as the dress color. I use this combo for Christmas a LOT when I want a bright, cheery green - G28, G09, YG09, YG05.

Once the coloring was finished, I trimmed the panel so just a hint of the green sparkle of the background layer would peek out and frame the image, playing off and complimenting the green of the dress.


I then stamped a Mathia sentiment that fit and embossed it. I attached my panels to each other and then to the card base. I then went in with my white gel pen and added the dots and plus signs to her dress to represent it sparkling. One less Christmas card to make!

Until next time....
DT Dawn


09:00 No kommentarer

 I love making Christmas cards. If I could make Christmas cards year round, I would! So we are now in my favorite time of the year to be an artist! I also absolutely adore everything from Stamping Bella. This bundle girl is so cute!!!

I started out by stamping the image on my card panel. I wanted her slightly off centered so I could color in a simple, yet fitting background. I used my Copics to color her up, and drew in the background using 4 different green copics to give the illusion of depth. It doesn't matter which colors you use, as long as you have a light, medium light, medium and a dark color. They don't even have to all be green!

I used my silver Uni-ball gel pen to trace over the lines of the tree lights. A small detail that won't stand out on it's own, but adds to the card.


I then stamped a sentiment from Mathia and embossed it with silver. I trimmed the card panel by 2 mm on each side and cut a piece of purple paper to act as the frame of the card. I attached both panels to my card base and called it done!

Until next time...
DT Dawn

09:00 No kommentarer


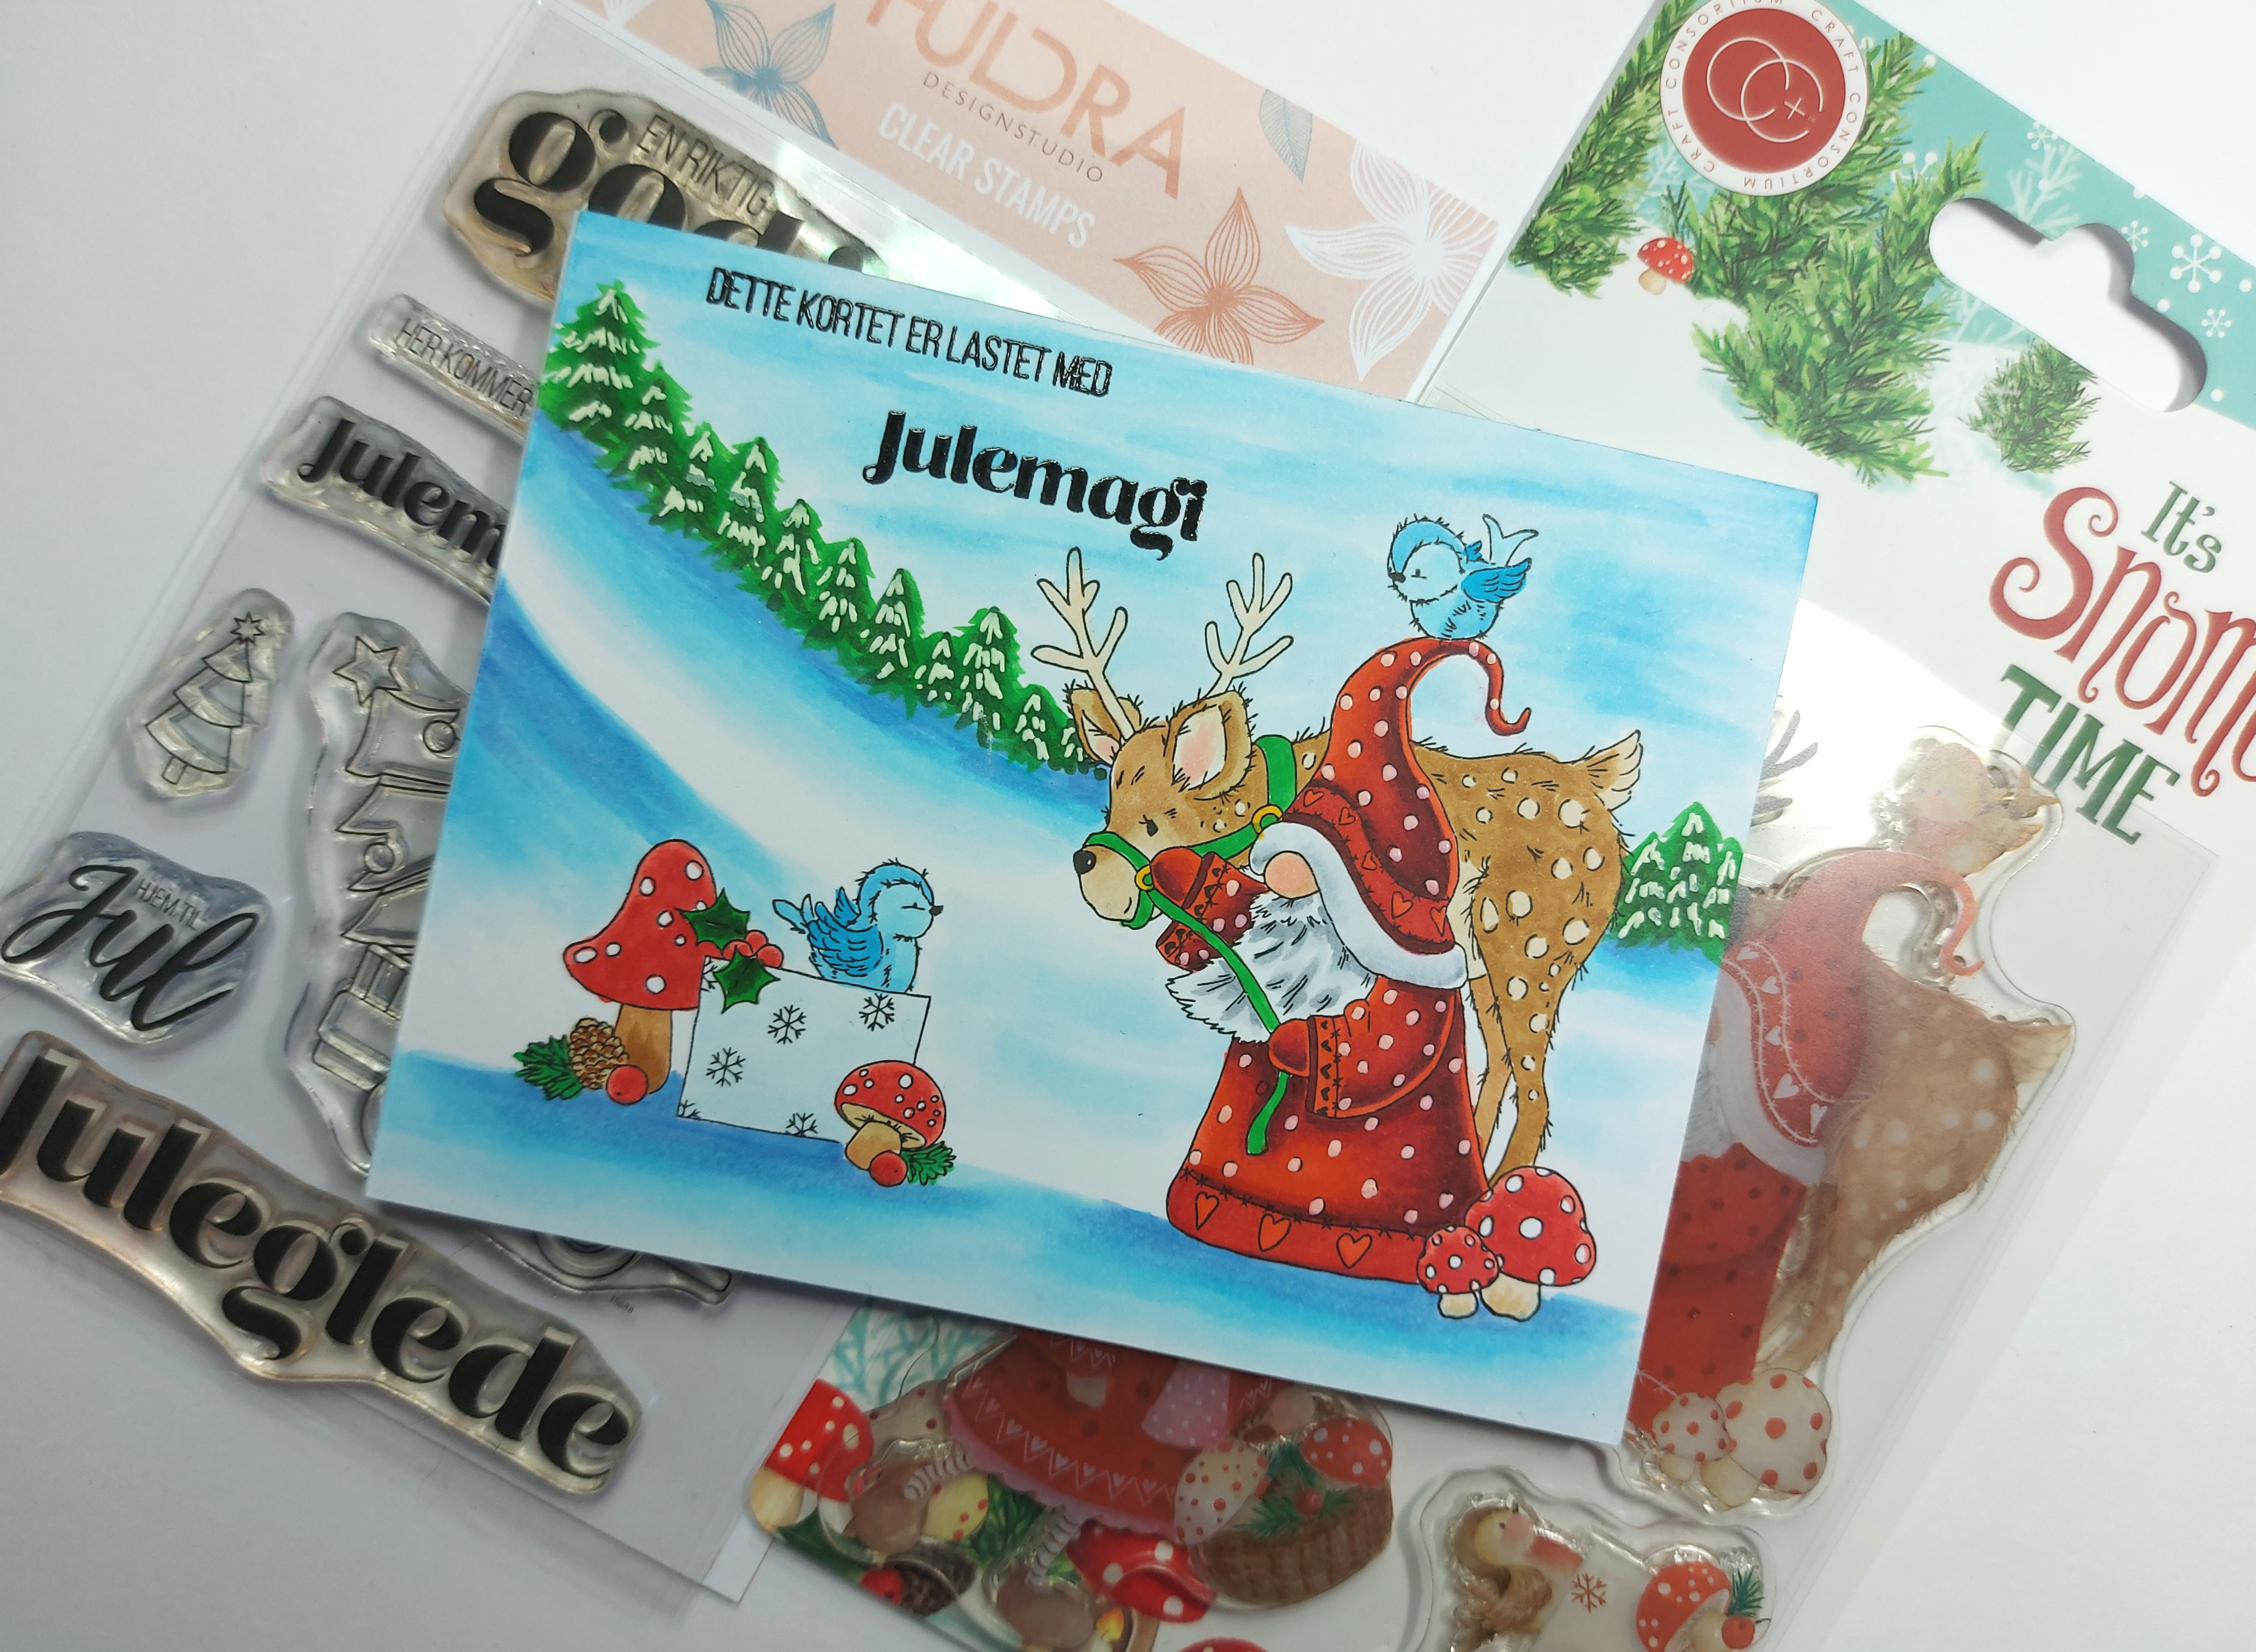
 The Craft Consortium company calls these adorable characters Snomes and what a great name for them! I was thrilled I got to color these images for Christmas and make them into cards.

I first stamped the main characters on a Neenah panel and colored them using Copic markers. First I colored the characters in my favorite red Copic combination (R59, R37 & R05) and then colored in the background. I found a picture of a winter scene I liked and used that as inspiration for the background.


Once that was complete I carefully stamped Huldra's Juleklem stamp with embossing ink and heat emboss a beautiful silver embossing powder. There wasn't much else to do but attach my colored panel to my card base! There isn't a lot of assembly with cards like these so you can spend the extra time coloring.


Until next time...
DT Dawn

16:00 No kommentarer

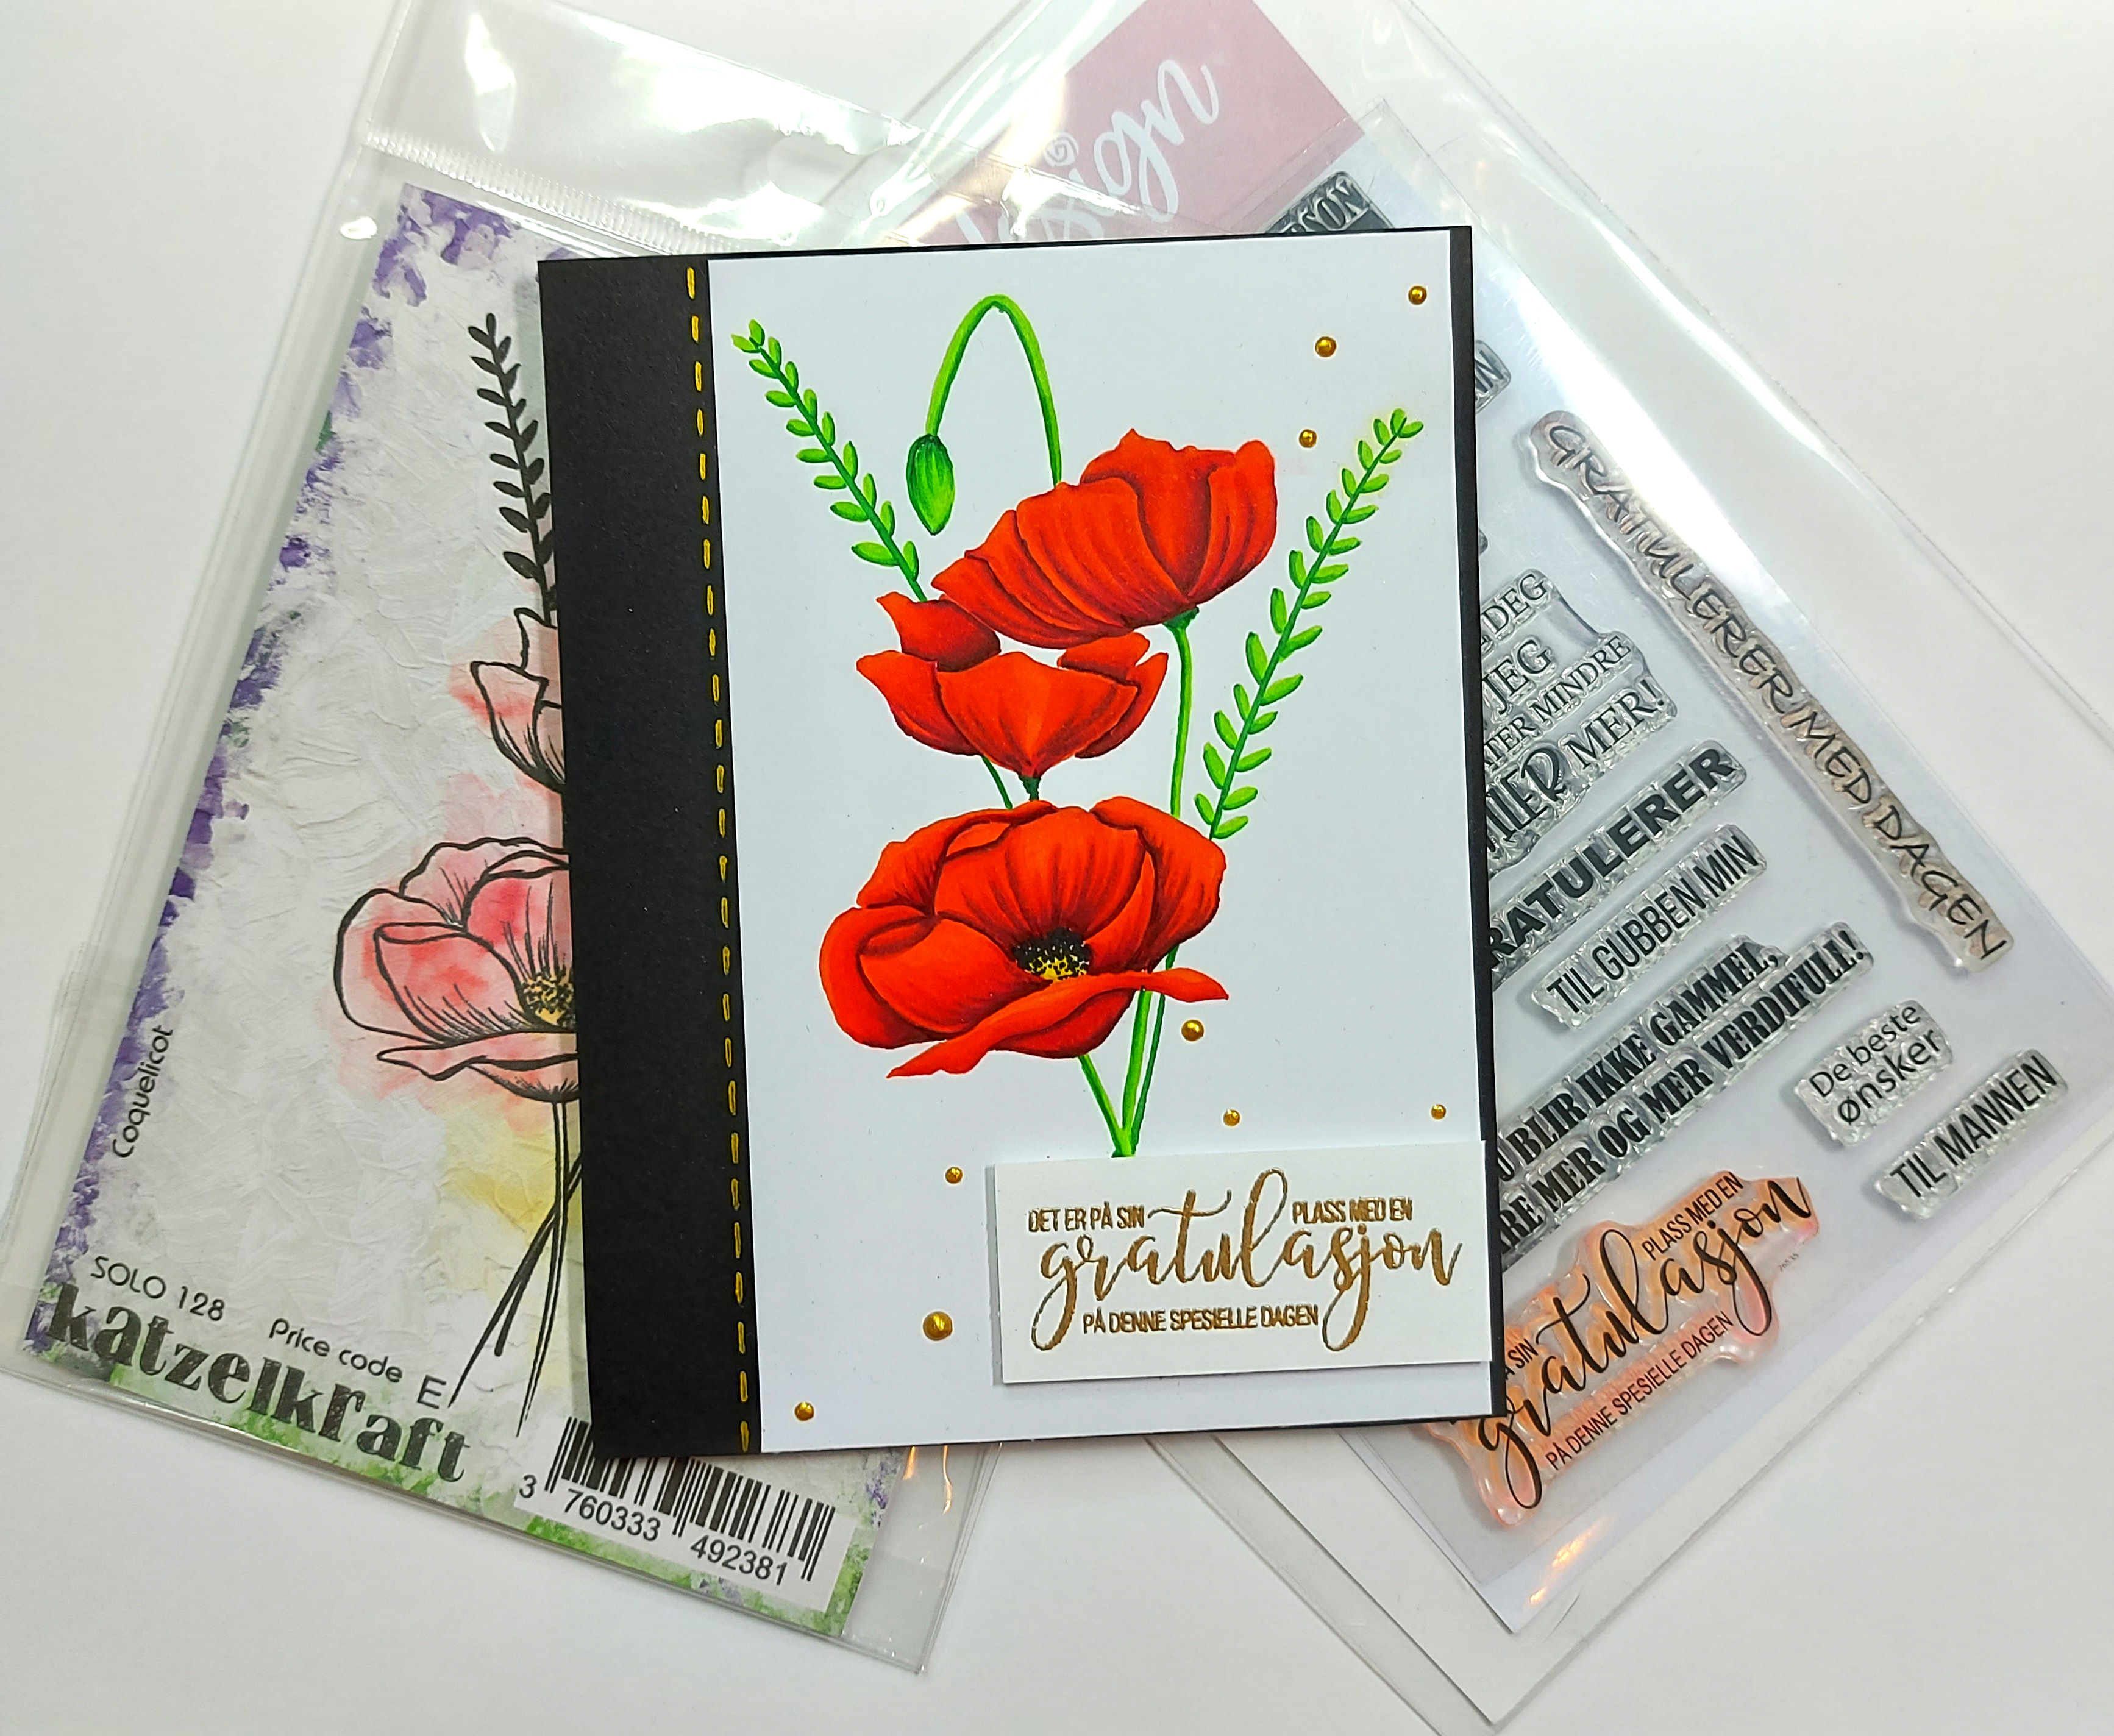
 Today I am bringing you a Copic colored birthday card with a newer stamp from Katzelkraft. This has quickly become a favorite of mine to color. I assure you, there will be many more examples of this stamp to come!


First I stamped this poppy stamp with Inkon3 no-line coloring ink. I colored it using Copic markers using my favorite red combination (R59, R37 & R05.) I then stamped the Mathia sentiment on a piece of scrap card stock with embossing ink and embossed it in gold. I added some gold perler dots randomly on the colored ink panel to tie the two together.


I trimmed down the colored panel and added a few strips of scrap paper in black so it would have some good contrast on both sides. I added some dashes on the largest black piece with my gold Uni-ball gel pen. If you have not tried the Uni-ball gel pens, run right now and get them because they are amazing. Løp og kjøp! I use the white one on every single Christmas project I make!


I popped up the sentiment using some foam tape and attached the finished colored panel to my card base. I adore this red color and I think it is perfect for this stamp! Do you agree?

Until next time....
DT Dawn

09:00 No kommentarer

 I've already started designing Christmas cards for this year! I know it's only September and the coffee shops have just started selling pumpkin lattes but really, is it ever too soon to start with holiday cards?

I'm kicking off my holiday card series with a simple winter scene using a stamp set called Mr. & Mrs. Snome. Snow + Gnome = Snome. So clever, right?


I stamped out Mr. Snome and a gift accessory on Neenah cardstock and colored them in with Copic markers. I then colored a simple, wintery background, also with Copics. I try to keep backgrounds relevant to the card but simple or boring enough so the subjects take the center stage.

Once it was all colored, I stamped the Huldra sentiment in Versafine ink and clear embossed it. I cut and score my card base and attached the colored panel. Finally, I used a white gel pen to add snow to the trees and dots on his clothing. Typically I color over little details like that and just add them back on later as it saves a lot of time and often looks better in my opinion!

Until next time....
DT Dawn


09:00 No kommentarer

 I went with a C&S style for this card as the Lily was pretty enough on its own.

I used my Copics to color in this LDRS Lily on stamping card (I forgot to write down which colors I used but I do most of my coloring on Twitch if you ever want to watch - just search for CardsandCollars).

I then stamped a Mathia's sentiment and embossed it with Hero Arts Titanium embossing powder. I trimmed both the sentiment piece and the flower panel and cut a spare piece of paper to my card size.


I attached the orange piece to my card base and the flower panel on top of that. I used foam tape to attach the sentiment piece and raided my bling stash for some pieces in different sizes.

All in all, I think it's a very attractive card good for many occasions!

Until next time...
DT Dawn

09:00 No kommentarer

 I love stamps that are just perfect for Birthday cards! (It makes my job so much easier!) This stamp set from MFT - Birth yay! is absolutely one of those stamps!


All of the animals are already set up on top of each other so there's no need for crazy masking! All you have to do is color it and you're done! 

I decided to go a little fancy and have a color-rich rainforest type of background. All kids love colorful things! But you could also easily have it as a clean and simple card as well.


Once it was colored (with Copics), I die cut an old Papir Design die in bright, contrasting colors. (I don't have any of the new ones yet but I really do like the font. Have you seen them?)

I added my colored panel to my card base, affixed the sentiment and my card was complete.


Until next time...
DT Dawn

09:00 No kommentarer

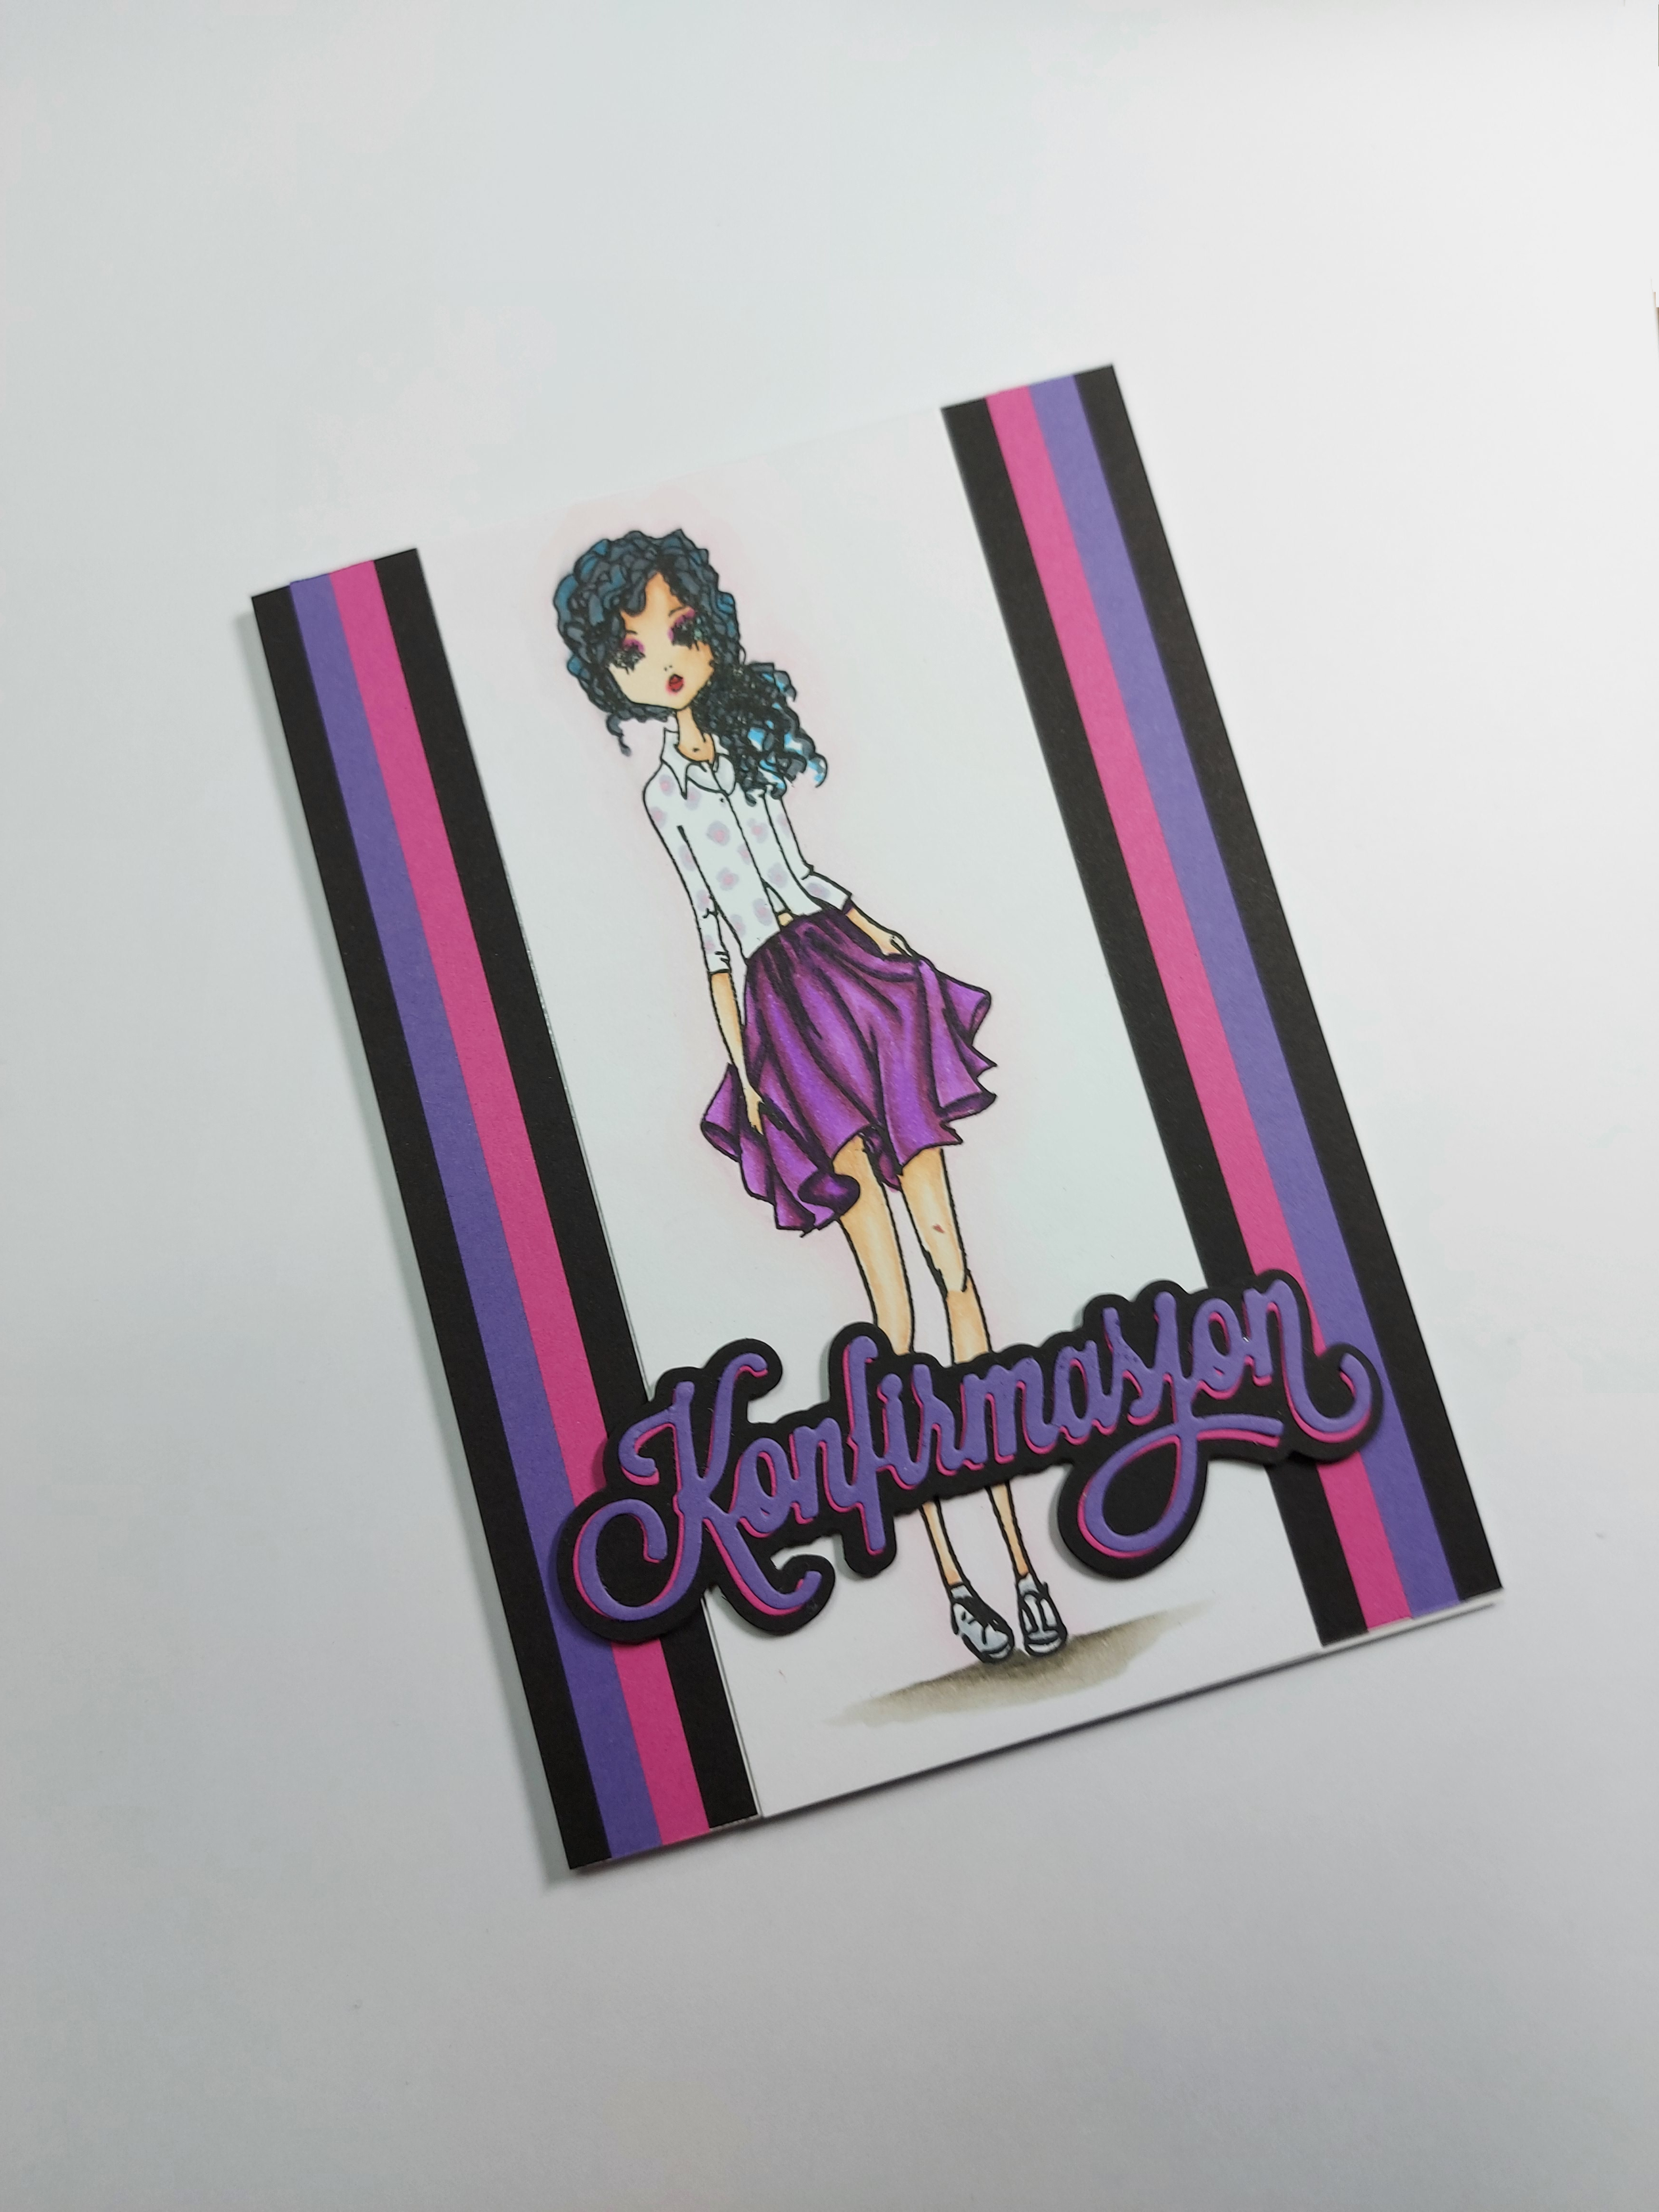
 Konfirmasjon time is soon upon us here in Norway and I thought I could fit in just one more konfirmasjons card for inspiration.

Using my Copic markers, I colored this Picket Fence - BFF Elise stamp in my favorite purple combination (V09, V06, V04, V01). I then took scraps of purple, pink, and black paper and cut thin strips to frame the image and also die cut the sentiment while I was at it.

I couldn't decide which color to use for the sentiment (an old Papir Design die), so I just used all of them. I think it adds a nice little boost with the pink slightly off of the purple die cut!


I thought the shirt was too plain being left white so I took a very light purple and pink and drew in flowers.

I taped the strips and my colored panel to my card base and popped up the sentiment with my favorite foam tape.

A quick, easy-to-make konfirmasjon card for anyone that doesn't have the time to go all out this year!

Until next time...
DT Dawn

09:00 No kommentarer


 Purple is my favorite color. If I can color something in purple, I will color it in purple. Luckily for me, purple fits *perfectly* with flowers.

I'll add that this Magnolia Blossoms stampset from MFT has quickly become a favorite to color!


I colored this with Copics and remembered to write down the colors used for you.

Purple Flowers: V09, V17, V15, V12, V000 & BV000
Stems: G99 & G94
Leaves: YG67 & YG61


I cut it slightly smaller than A2 card size and added a purple panel behind it. I taped it to a super heavy card base. I added a little bling and then added some clear liquid pearls to finish it off.

Until next time...
DT Dawn


09:00 No kommentarer

 Mother's day is the 13th of February this year so you have 8 or so days to get something together!


MFT has a gorgeous stamp called Fresh Cut Flowers which are great to use with every color family. They are beautiful and quite adaptable, being able to be used for any occasion.

This card is very simple with just a stamped panel and an embossed sentiment banner. I stamped the sentiment first, embossed it in gold, and then placed the banner die over it so it was as centered as it could be. I used my favorite 3M foam tape under the banner to give it a little dimension.


I chose a neutral color family for the flowers to make them a little more unique. You can add as much shadow as you want! If you want a lighter flower, don't add as much as I have here. These flowers are really quite forgiving and very versatile!
 

Here are the markers I used:

Flowers: E04, E11, E00, E50
Stems/leaves: YG67, YG63, YG03


Until next time.....
Dawn

09:00 1 kommentarer

 I love Stamping Bella stamps. Love, Love, LOVE them! If you like that style of stamp and enjoy coloring, I think you and I can be very good friends. 😁

Today I have a Slimline card featuring the Stamping Bella Snowfight Penguins stamps. I cut a piece of Neenah cardstock 22cm x 18cm and folded it in half so it measured 22cm x 9cm. I stamped the 2 penguins and grabbed my Copics!


I created a simple background behind them and Voila!, a cute, winter card that is good for most occasions. 

Until next time...
Dawn

09:00 No kommentarer
Older Posts

Om oss

Her finner du HOBBYKUNST's blogg, et univers av kreativ inspirasjon fra vårt dyktige designteam. Hver uke blir bloggen oppdatert med forskjellige bloggposter av alle slag, og vår drøm er å få flere folk til å være kreative!

På Karihaugen i Oslo finner du vårt fysiske kreative univers, med over 16.000 produktenheter, kursrom og ikke minst fagkunnskap om våre produkter. Designteamet jobber med produkter fra vårt sortiment, og her kan du lære mye i tillegg til å få inspirasjon fra din favoritt designer.

Følg oss

Følg oss gjerne

Totalt antall sidevisninger

Søk i denne bloggen

Labels

3D 49andmarket ATC Aktiviteter Album Alexandra Renke Alkoholblekk Alter American Crafts Art Journal Avery Elle Baby Barnehobby Bazzill Betong Betongpaste Bind it all Bo Bunny Bordkort Brettekort Butikken CAS Carabelle Caran D`Dache Carljin Design Chalk Paint Ciao Bella Common place Copic Copics Crafter's Companion Crealies DIY DT Anne Lise DT Benthe DT Connie DT Dawn DT Franca DT Helle DT Janne DT Kirsten DT Sissel Anita DT Susanne Decoupage Dies Distress Crayons Distress Ink Distress Oxide Dåp Embossing Extreme Sheen Farsdag Favorite things Garn Generell Hobby Graphic 45 Home decor Huldra Designstudio Inkon3 Jul Julekalender Julekort K. Creul Kaisercraft Kalender Katzelkraft Klippeark Kortlaging Kurs LDRS Creative Lawn Fawn Layout Ledlys Lerret Little Darlings Lommescrapping Maja Design Mal Maling Mathia Mathia Design Mathia stempler Mathiablomster Minialbum Mixed media My Favorite Things Neat and Tangled Nuvo Nyheter Oppskrifter Papirdesign Papirprosjekt Picket Fence Pion Planner Pretty Pink Posh Prima Produktanbefalning Project Life Påske Påskeegg Rayher Rayher dies Reprint Rustmaling Scrapbooking Simple Stories Sjablong Smykker Solo Goya Spellbinders Stamperia Stamping Bella Steampunk Stensil Studio Light Studiolight Svarta Fåret Tag Teknikker Tim Holtz Tips Tutorial Washitape We R memory keepers Zig Clean Color Brush adventskalender akrylmaling akvaralltusjer armbånd art impressions bakgrunner barnebursdag binderskort bling blomster blonder bryllup bursdag clean and simple craft consortium die cuts fargelegging folie gaveide gaveinnpakning gavepose gelatos gjenbruk glittertape guttekort hero arts herrekort interiør invitasjon julegave julekule julepynt juleverksted kjøkkenkluter klistremerker kondolanse konfirmasjon kork kort leire mathia blomster mathiastempler morsdag mosegummi oppbevaring oxide pakkelapper paljetter pink fresh restepapir shakercard sjokolade slimline småkort snøpenn stempel ull valentine
recent posts

Created with by ThemeXpose